 XMEye Docs
Recorder (DVR / NVR) Setup
Prepare your DVR, HVR or NVR recorder and connect it to the XMEye mobile app, from recorder network settings through cloud account registration, adding the device by P2P, and watching the live preview.
This guide walks you through preparing a DVR / HVR / NVR recorder so that the XMEye mobile app can connect to it, then registering an account, adding the recorder, and viewing live video.
1. Recorder network settings
Before starting the mobile-app setup, make sure the recorder is connected to your router and that its network configuration matches the router's setup.
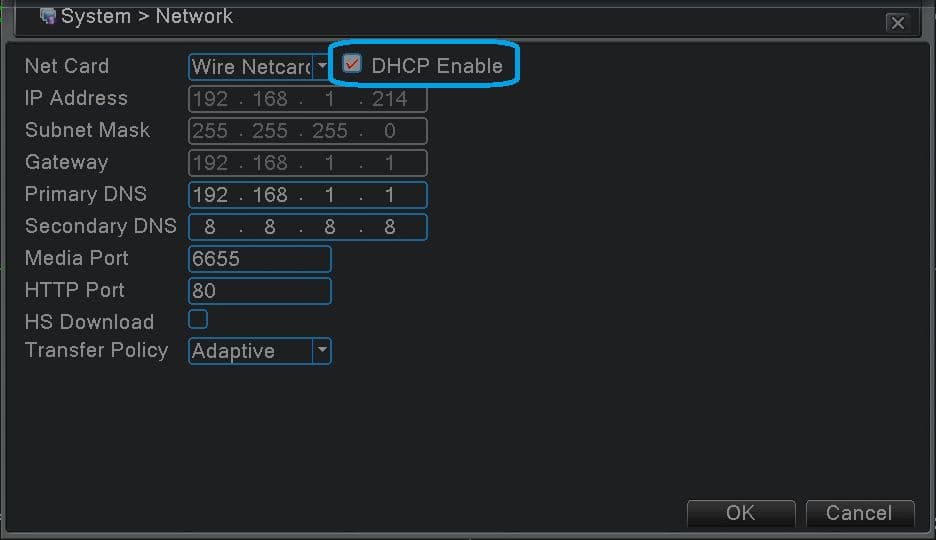
The easiest way to ensure the recorder's network settings match the router is to use the automatic network-settings assignment protocol — DHCP.
Wired connection
Open Main menu -> System -> Network and tick DHCP Enable. The recorder will then obtain its IP address, subnet mask and gateway automatically from the router.
Wi-Fi connection
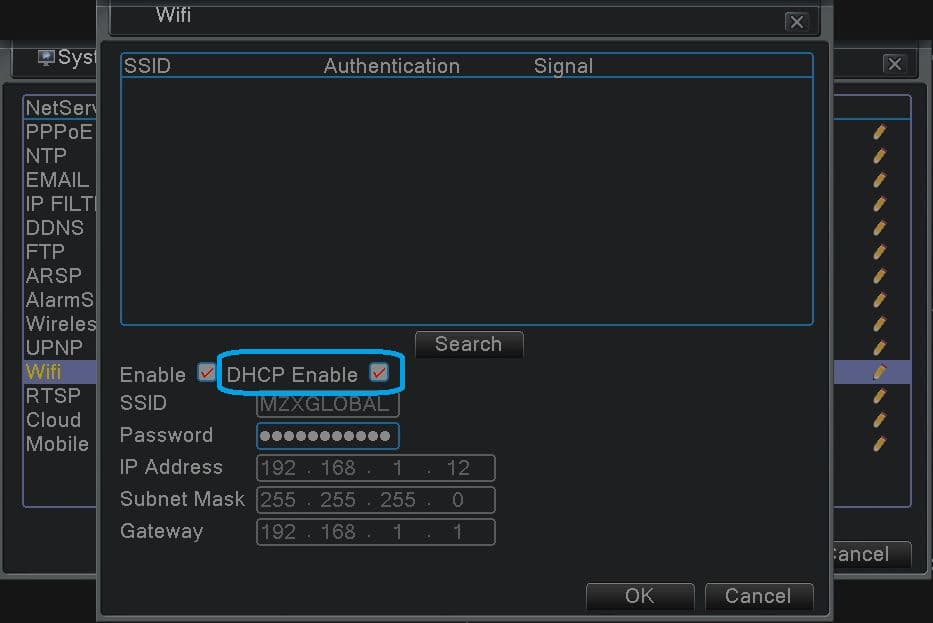
If you are using Wi-Fi, open Main menu -> System -> NetService -> Wifi, tick Enable and DHCP Enable, then select your SSID and enter the Password.
Reboot to apply
After changing network settings, you may need to restart the recorder for it to acquire the new settings from the router. Go to Main menu -> Logout -> Reboot.
2. Check connection status and serial number
You can confirm that the recorder has reached the cloud, and find the serial number you'll need for the app, directly in the recorder's menus.
Cloud connection status
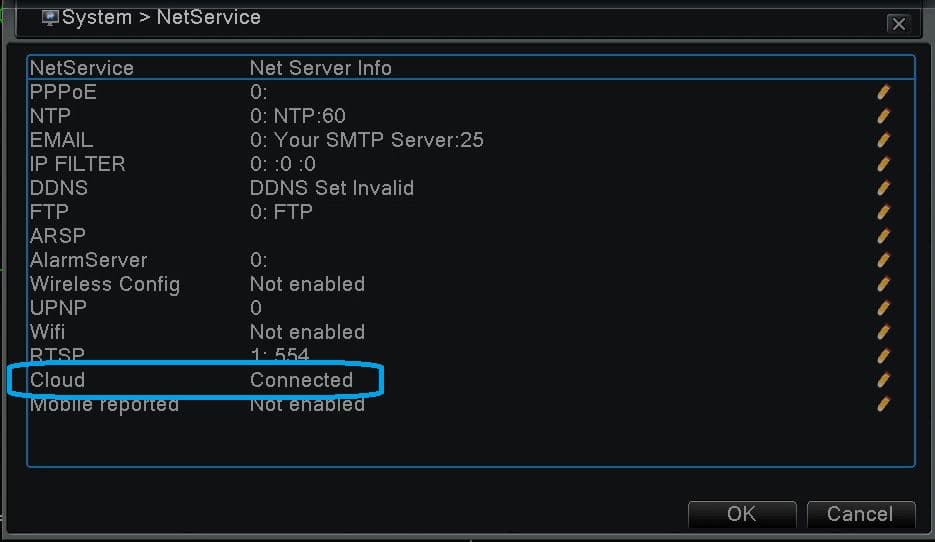
The status of the mobile-app connection can be found in Main menu -> System -> NetService. Look at the Cloud row — it should read Connected.
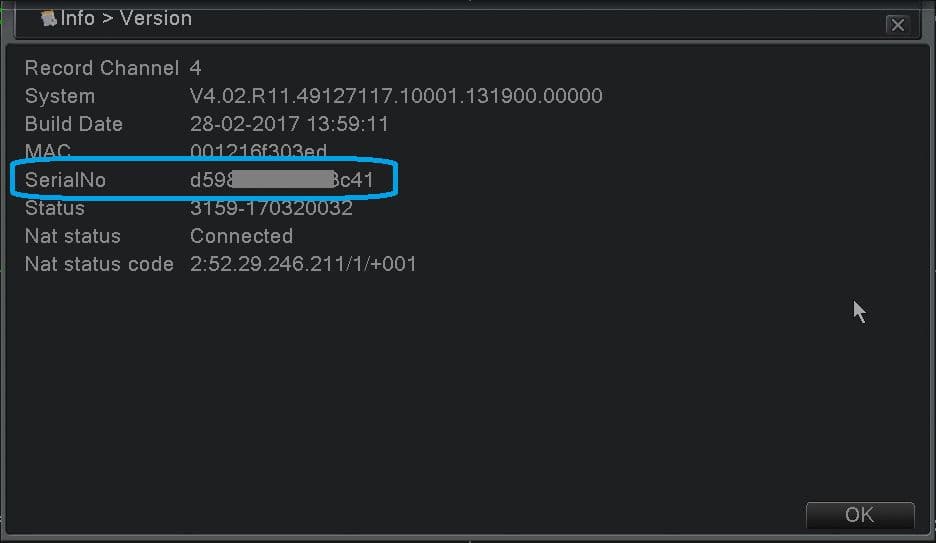
Serial number
The serial number used by the mobile app can be found in Main menu -> Info -> Version, in the SerialNo row. You'll enter this when adding the device in the app.
3. Install the mobile app
The XMEye app is available for iPhone, iPad and Android phones. Search for XMEye in the Apple App Store (iOS) or Google Play (Android).
Alternatively, you can scan the QR code labelled Android APP or iPhone APP from the recorder's Guide menu to download the app directly.
Installing the app
For full step-by-step installation instructions, see Install the App.
4. First run
Once the app is installed and running on your phone, you can either:
- Register an XMEye cloud account and add your recorder to it — device details are saved in the cloud, so they follow you to any phone where you sign in; or
- Use Local Login — added device information is stored only in your phone's memory.
The steps below cover the cloud-account route. If you prefer local storage, skip to Login and tap Local Login.
5. Register an XMEye cloud account
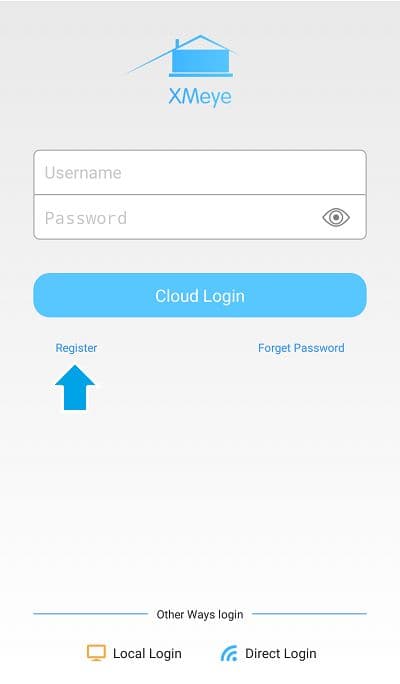
Open the Register screen
On the login screen, tap the Register link below the Cloud Login button.
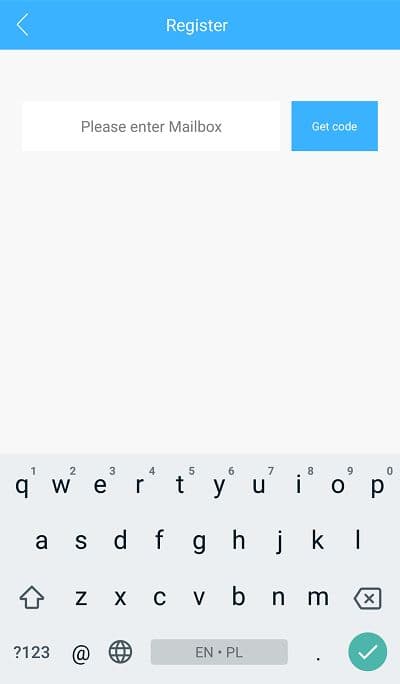
Enter your email and get a code
Type your email address into the mailbox field and tap Get code.
Enter the verification code
Check your inbox for a message from the XMEye (XM) security team. Enter the verification code into the code box and tap next. If you need a fresh code, tap Try again.
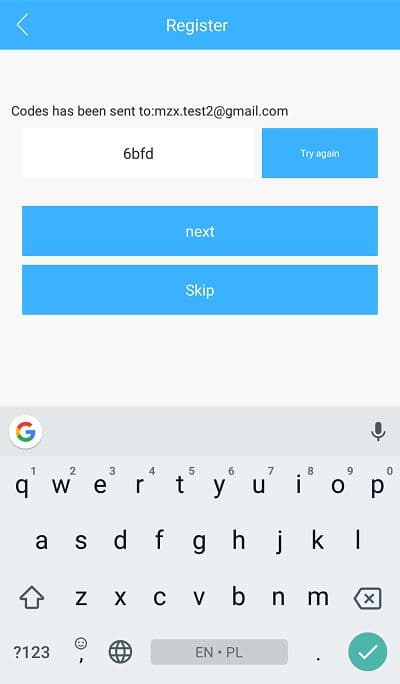
No email?
If the email doesn't arrive, wait about 120 seconds and a Skip button will appear, letting you continue without the code.
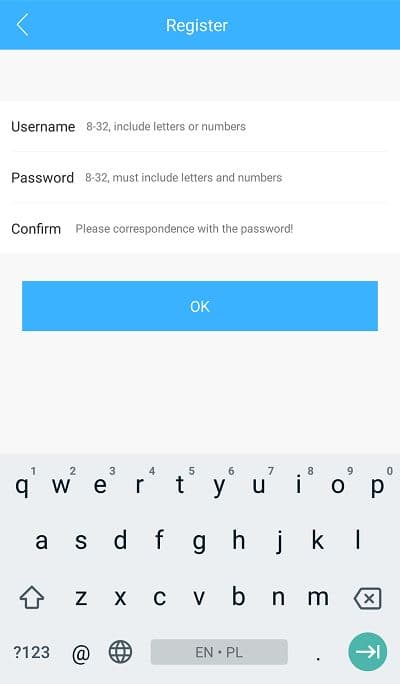
Set your username and password
Fill in the registration form with your desired Username (8–32 characters, letters or numbers) and Password (8–32 characters, must include letters and numbers). Re-enter the password in the Confirm field, then tap OK.
6. Login
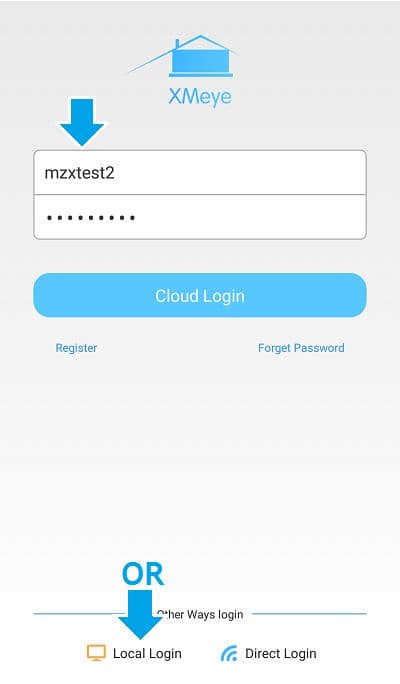
To continue, log in. Enter your registered Username / Password and tap Cloud Login — or tap Local Login instead if you'd rather not use an account.
7. Add the recorder (P2P)
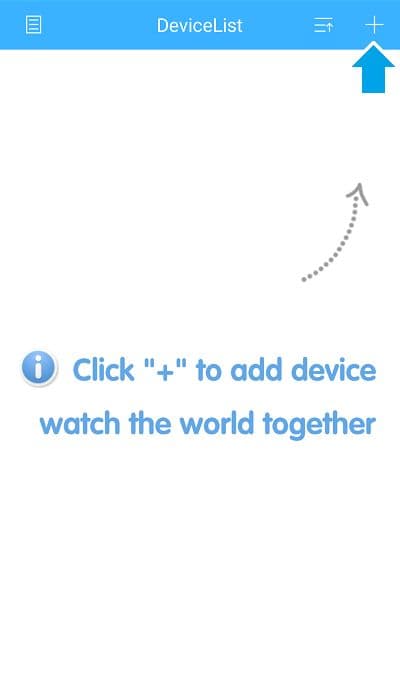
Tap the + icon
Once logged in, you'll see the Device List. Tap the + icon in the top-right corner to add your recorder.
Fill in the device details
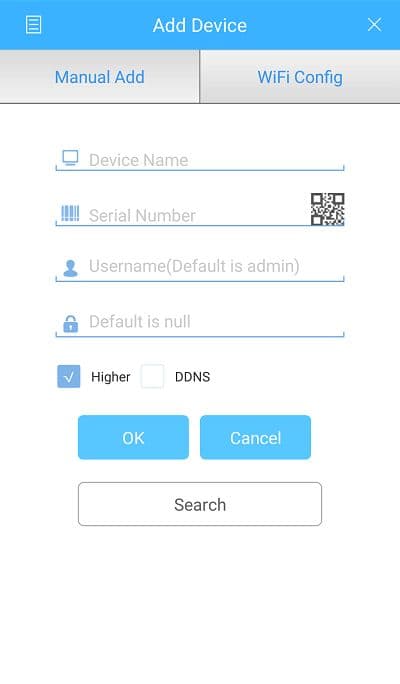
On the Add Device screen, tick the Higher box, fill in the fields, then tap OK.
- Device Name — anything you like; this is the name shown on the device list.
- Serial Number — the recorder's P2P serial number, from Main menu -> Info -> Version. You can also tap the QR icon to scan it.
- Username / Password — the credentials you use to log in to the recorder. The default username is admin with no password.
More ways to add a device
For other methods and full details on adding a device, see Login & Add Device.
8. Watch the live preview
After login, the app automatically opens the Device List. If you're on a different screen, tap the menu button in the top-left corner and choose DeviceList.
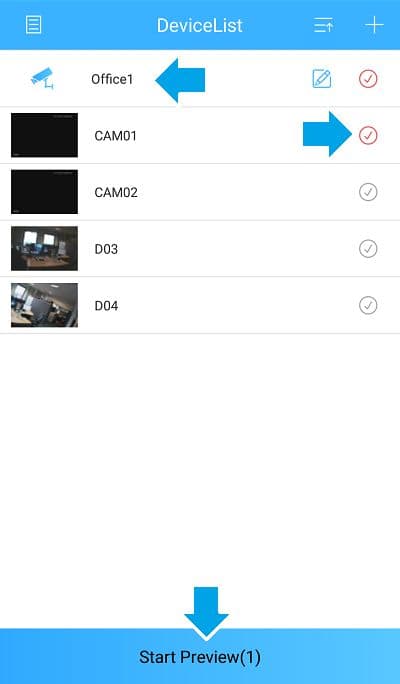
To watch the live stream from your cameras:
Expand the channel list
Tap your device name to expand its list of channels (cameras).
Select the cameras
Tap the tick buttons to choose the cameras you want to view. A red tick means the camera is selected; a grey tick means it isn't.
Start the preview
Tap Start Preview to open the live video. The button shows how many cameras are selected, e.g. Start Preview(1).
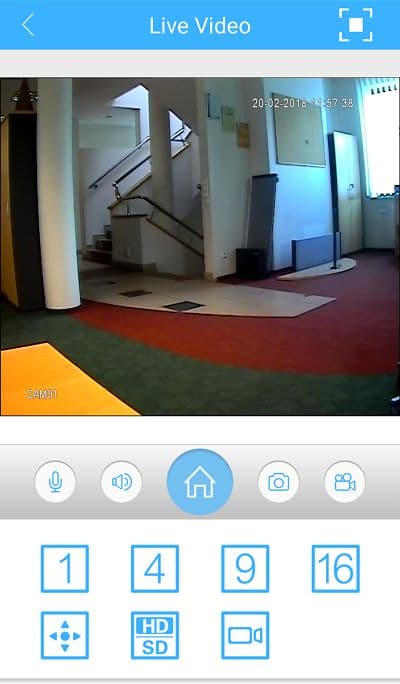
The selected cameras now stream live video.
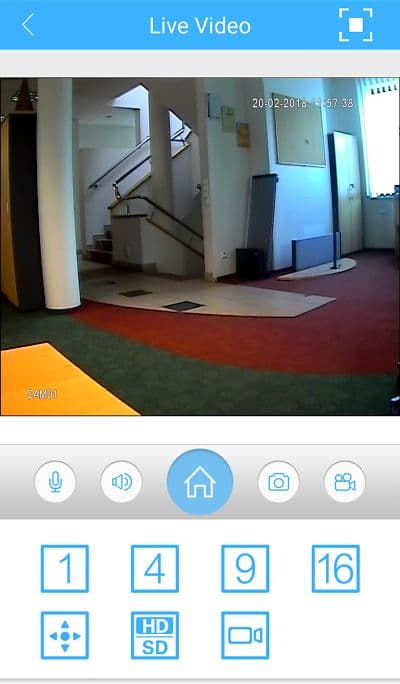
You can also open recorded footage from here by tapping the remote-playback icon.
Related pages
Learn more about working with the live image in Live View, and about reviewing recordings in Remote Playback.